
Background
A lot of people like karaoke, but aren’t quite confident/comfortable enough to sing in front of a bar full of strangers. And the cost of a private room can be significant. I used to run sound for churches and a venue, and I throw parties pretty frequently, so I decided to build a home karaoke setup that integrates with my home theater system.
Note: this is the second version. The previous one was a little jankier because I leaned more toward the home theater side: lots of RCA connections, multiple adapters on each run, cheaper cables. After it was shown that people liked the setup/experience, I wanted to redo it to hide some cables and lean more toward the pro sound side: XLR and 1/4″ connections, better cables, fewer adapters.
Components
Sound Board: Behringer XENYX X1204USB
Admittedly, this is overkill for purpose: the 1002FX I previously used worked just fine. I frankly just missed faders/sliders over knobs. However, upgrading also came with some niceties like per-channel muting and XLR mains sends. For me, onboard effects are critical for a setup like this because the raw mic signals are almost assuredly going to sound flat (especially in a small room), and you’re probably not going to buy a separate effects processor.
Receiver: Yamaha RX-V675
Any receiver with an RCA input will be fine.
Microphones: Sennheiser XS1 (pair)
Contrary to the random pic I grabbed for a featured image, I have a slight preference for Sennheiser over Shure (no significant reason, I’ve just used them more), and this is their entry-level model. It does the job for now, but it’s meant more for talkback and presentation purposes, so it lacks the texture of the e935s I used back in the day. This is my next upgrade point, probably to a couple e835s when I find a sale.
I always prefer wired mics unless there’s a specific reason to go wireless because there are simply fewer things to go wrong with wired (no batteries to charge/die, no RF interference, no base/handheld configuration mismatches, etc.). A drawback of using a wired mic in a venue is actually a feature for home karaoke: it’s a tether. People who have a few drinks may put a mic in a weird place and forget about it.
Video Player: Roku Premiere
Any independently-powered player with an HDMI output should work.
Audio Extractor: J-Tech JTD-3199
This is used to extract the audio from the HDMI connection from the player to the receiver so it can be sent to the sound board for mixing.
Queue Management: Samsung Galaxy A9+
Much easier and less chaotic than giving everyone access to manage the queue from their own devices.
I have a dedicated Google account for home media purposes, including this. I use that account to log into YouTube on both this tablet and the Roku so I can easily link the two. This has benefits for security (nobody can switch apps to see my real email/notes/etc.) and media segmentation (karaoke nights don’t affect the YouTube search history/algorithm for my real Google account).
Cables
Monoprice was my go-to brand for years, but a quick look around suggested Cable Matters is a good mix of quality and cost today. After the install, I have no complaints: the ends were secure, the connections were snug, and the texture/flexibility were what I expected from quality cables.
– 2x 1/4″ TS to Dual RCA cable (15ft)
– 4x 1/4″ TRS Extension Adapter
– 2x 1/4″ Straight Guitar Cable (25ft)
– 2x 1/4″ TRS to XLR Cable (Male to Female) (25ft)
The RCA output is inherently imbalanced, so as long as the couplers can deal with it, I think both TS and TRS cables should work fine.
Mic Stands: On-Stage Tripod Base
I don’t know why more people don’t use mic stands while singing karaoke. It also prevent mics from popping when they’re put down on hard surfaces between songs.
Design
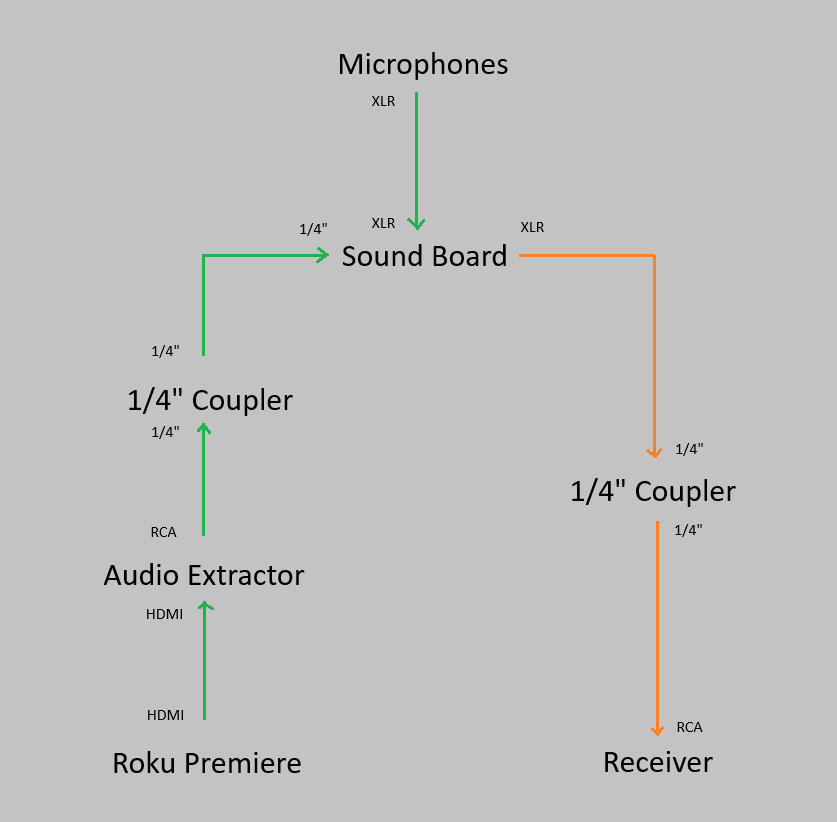
- The combined audio and visual signal originates at the Roku and is transmitted over HDMI
- The audio extractor receives the combined signal, extracts the audio, and transmits that audio signal separately over RCA.
- The combined audio and visual signal is passed via HDMI to the TV, which display the video.
- The speakers on the TV have their volume turned down to 0, so only the receiver can be heard.
- The audio signal is transmitted to the sound board over RCA (initially) then 1/4 (via coupler)
- The sound board receives audio signals from both sources
- From the Roku via 1/4″
- From the microphones via XLR
- The sound board transmits the combined mixed signal via XLR
- The audio signal is transmitted to the receiver over XLR (initially), then 1/4 (via coupler), then RCA (receiver input).
This allows full mixing capabilities on the sound board instead of having to adjust the volume of the receiver and microphones separately. The couplers had to be used because I couldn’t find adapter cables long enough to do the full runs (~40ft).
Installation
Like any AV installation, I first connected everything to make sure it worked as expected. Thankfully, it did.
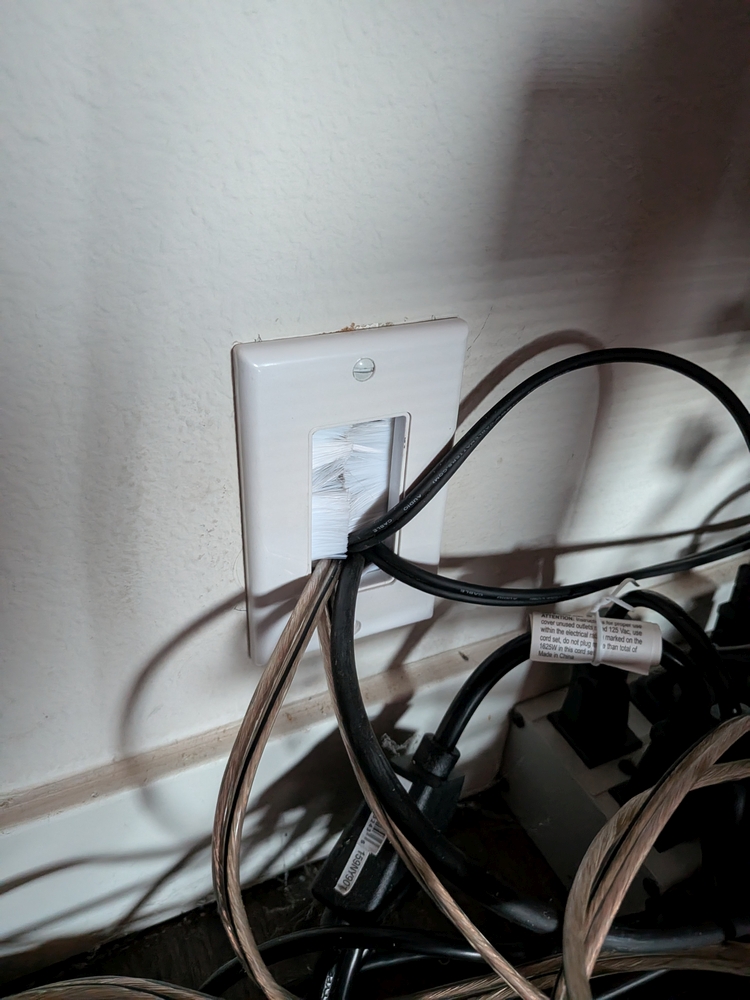
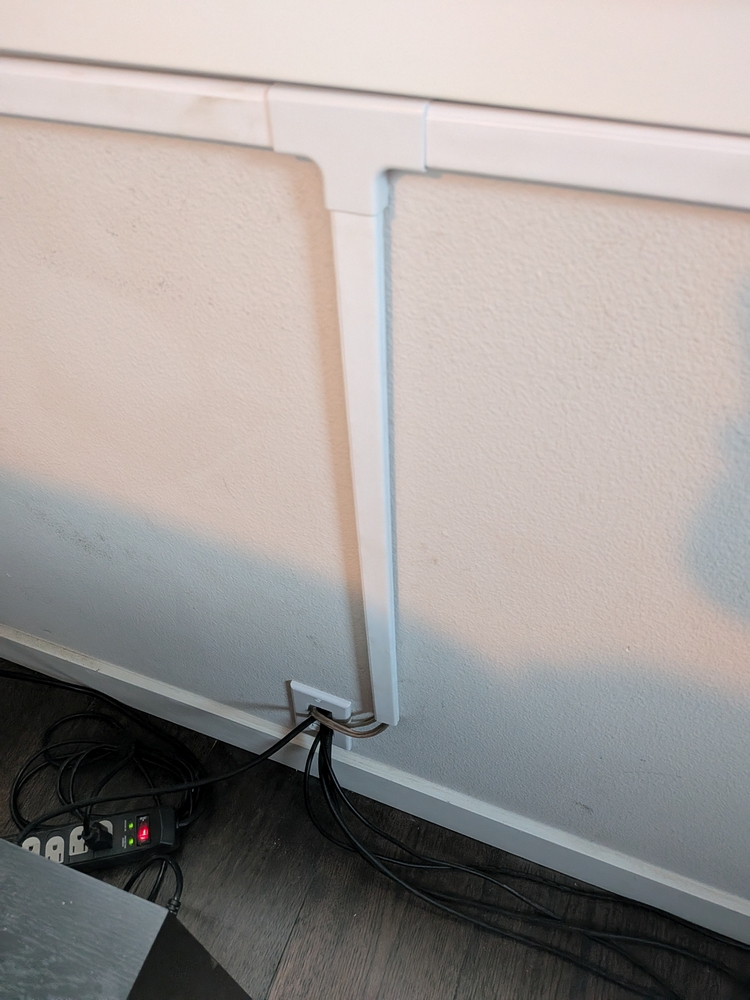
A friend previously helped me run some speaker cables through my crawlspace, so I already had brush wall plates on each side. Plates with actual AV connectors definitely look cool, but you have to add new plates or buy new faces each time you change something, so I prefer brush plates.
I’d forgotten that during the previous installation, we’d only made holes big enough for a couple speaker wires and a sub cable, so I needed to drill new ones. I marked the existing cables so I could tell the difference between left and right channels (black electrical tape = left), then unplugged them and pulled them into the crawlspace.
After a trip to the hardware store to finally buy a hole saw kit, I spent an extremely annoying hour-plus drilling the holes. The first one wasn’t terrible (just had to temporarily move some insulation), but the second was near the exterior of the house, and the space between the floor and the foundation was slightly too short for the combined length of the drill and hole saw bit. So I had to go diagonally through an existing hole with my view blocked by insulation while holding the drill above my head at an awkward angle. I overheated my drill twice, putting it in the freezer the second time to get it working faster. Afterward, my hair and shirt were covered in sawdust with some insulation thrown in for good measure.
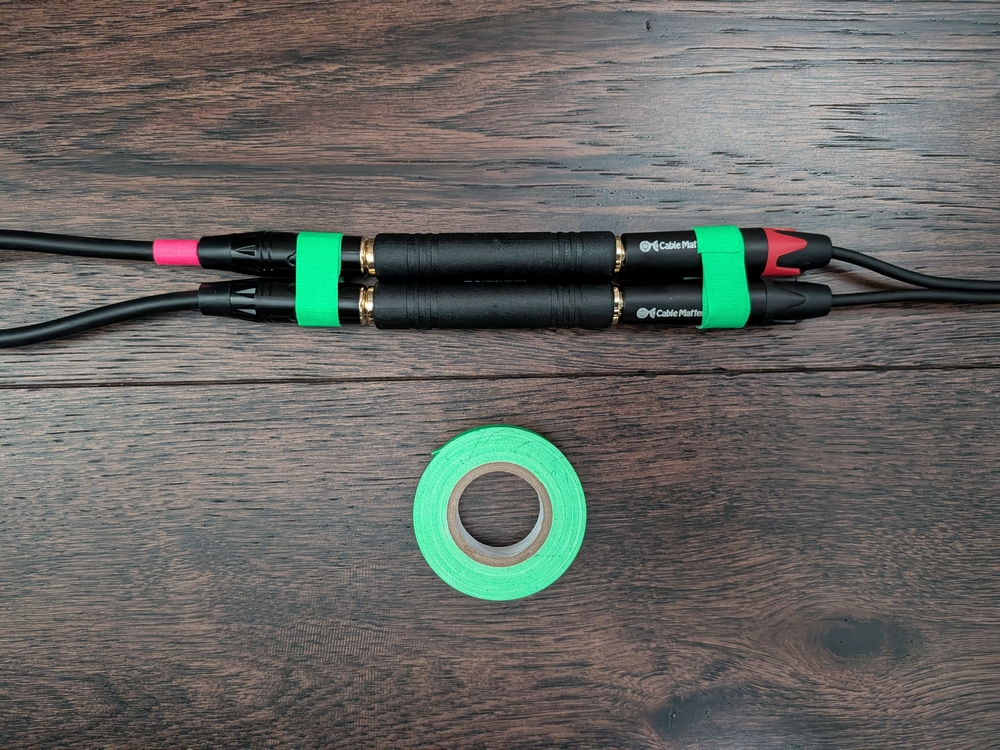
It made the most sense to gather all the cables in the crawlspace and fish them up through the brush plate holes. Before I took everything to the crawlspace, I marked the cables with neon gaff spike tape to indicate the 1) red side of each cable pair to ensure I got the left/right correct and 2) the paired ends to ensure I attached the correct cable pairs via the couplers.
I removed all parts of the brush plates from the walls (easier to work with the cables) and started at the outlet behind the home theater system, fishing the cables from the crawlspace by attaching them to the fish wire with electrical tape. After running them through the brush plate pieces, I plugged them into their components so knew I had enough slack out of the wall.
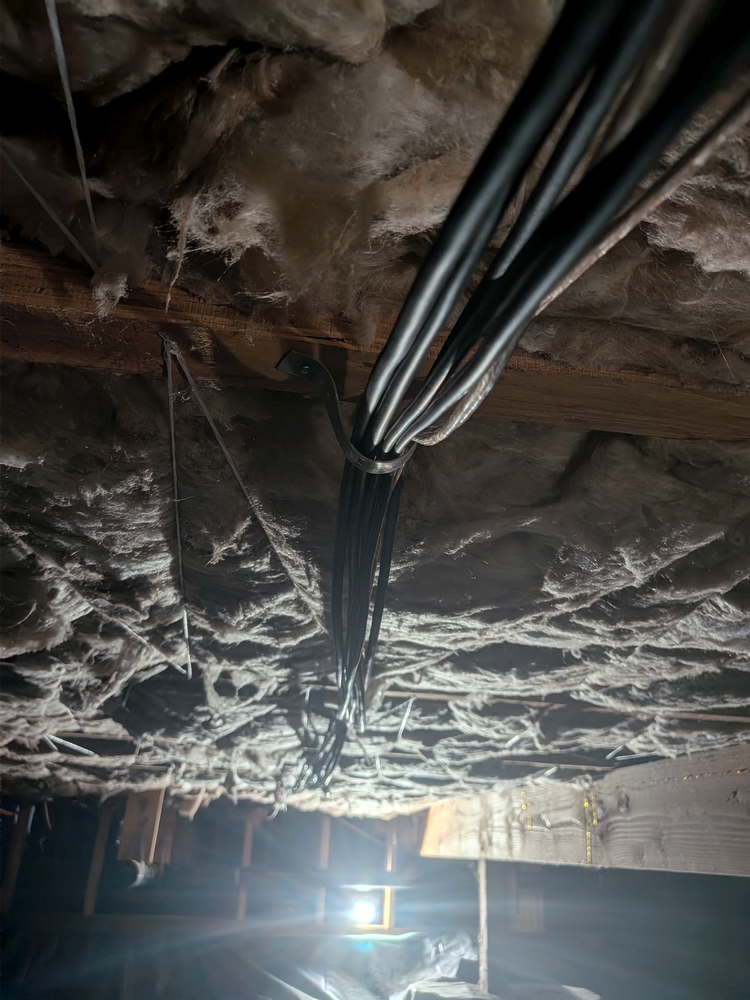
I then used 3/4″ pipe pipe hanger strap and the smallest wood screws I could find to make cable harnesses on the bottoms of all the floor joists between the brush plates, avoiding the connection points of the insulation support lines. In leaving enough room for the XLR pairs, I also left room for possible future needs, such as expanding to an Atmos speaker setup.
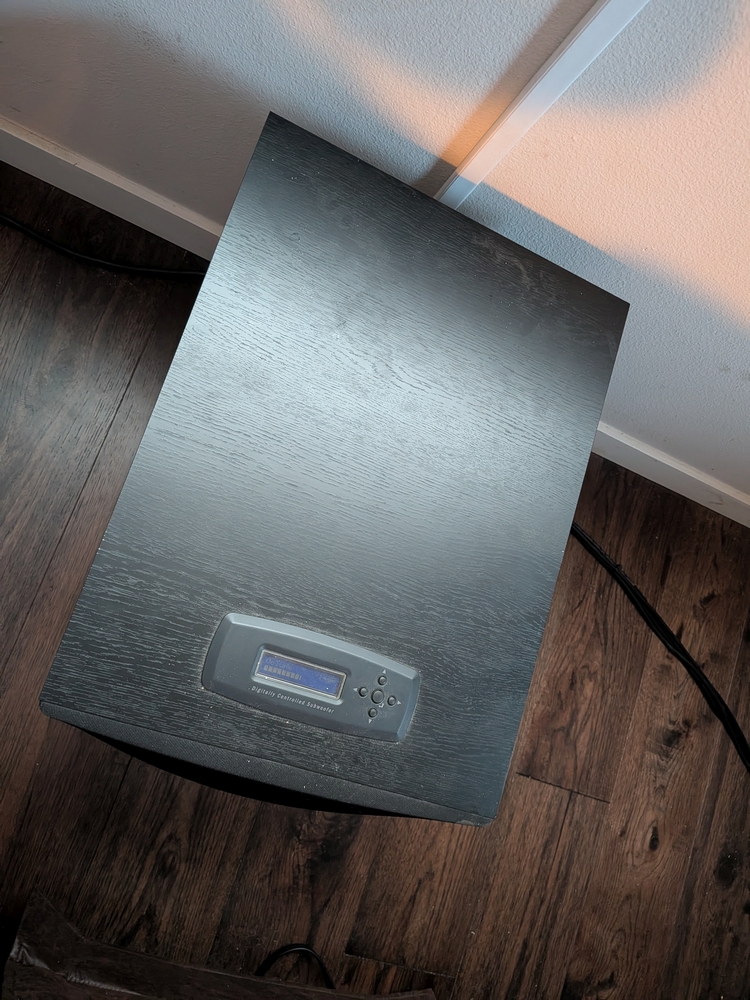
At the rear of the room under the other brush plate, I repeated the fishing process, leaving the excess cable for the rear channel speakers and the subwoofer in the crawlspace so it would look cleaner topside. I pulled the karaoke cables fully through so I’d have as much flexibility as possible while using/storing the board.
After putting the rear channel speaker wires back in their runs, I put zip ties on the “snake” of karaoke cables about every foot so they looked a little cleaner and would be less likely to get underfoot.
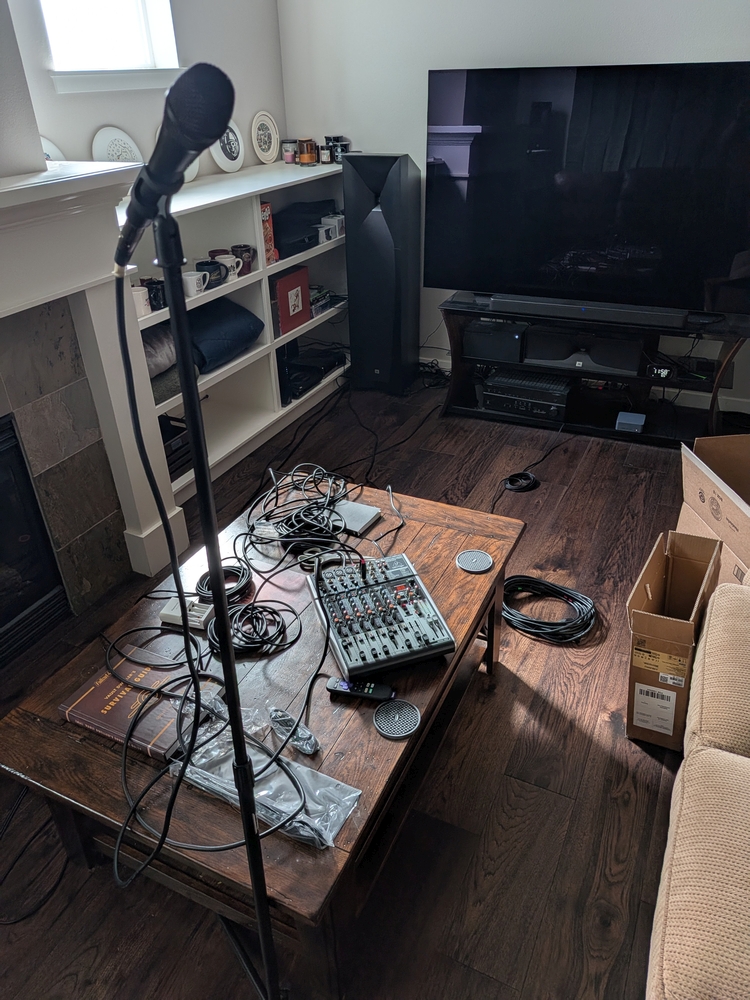
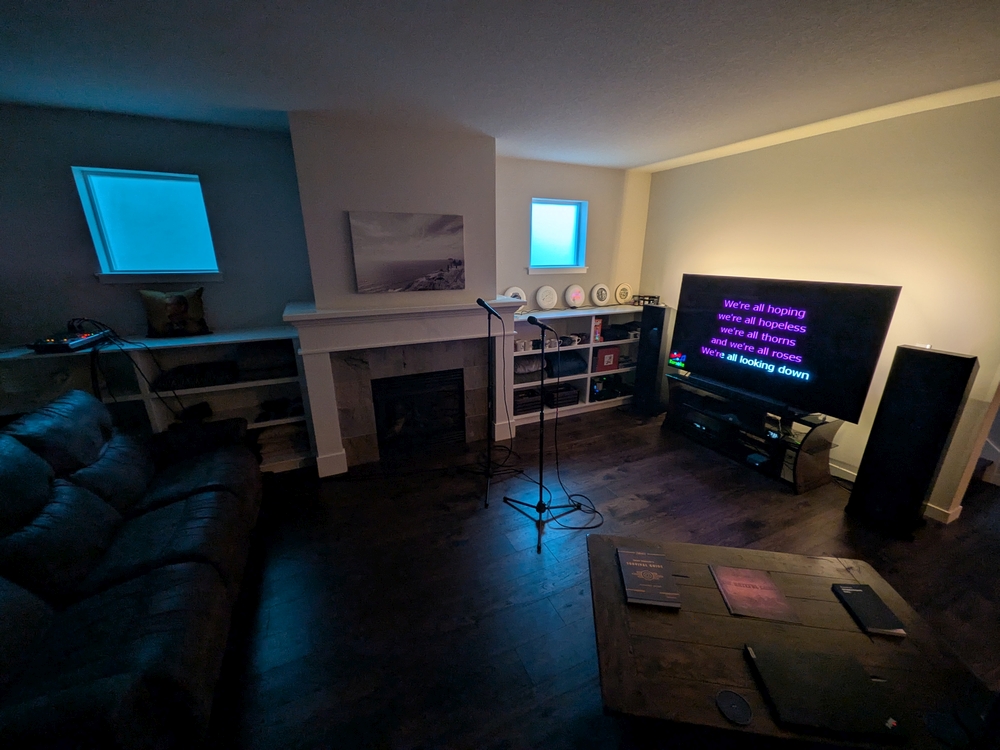
With all electronics powered off, I double-checked my logic and connected the cables to the sound board. I then turned everything on and started a video on the Roku with my fingers crossed. Everything worked just like it had during testing with no noticeable buzz or hum. This is what it looked like after cleanup.
With the previous setup, I had to run two pairs of wires on audience left from front to rear before every session, then re-roll them and tuck them back in the shelving afterward. With the new setup, I just need to connect the mics to the sound board via 25ft XLR cables. All cables that link the sound board to the receiver are permanently connected and (effectively) hidden.
Tips for Running Home Karaoke
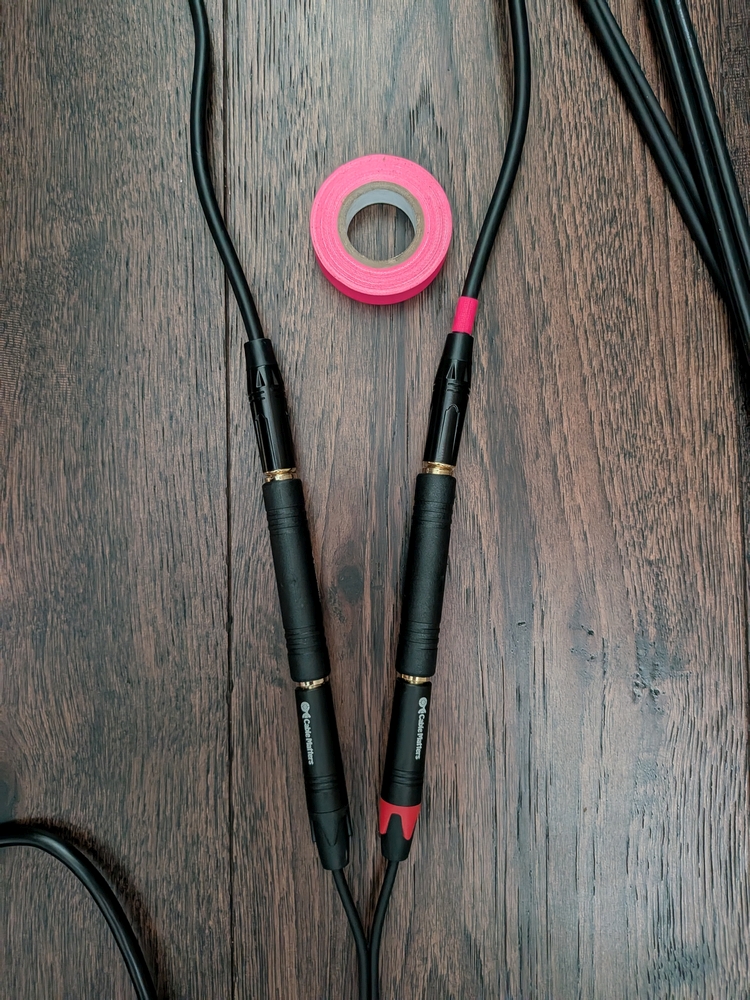
- Mark the mics’ XLR cables
- My cable for Channel 1’s mic has a single neon green gaff tape ring on each end
- My cable for Channel 2 has two neon pink rings on each end
- This helps to identify channels after the mics have been used several times and put back on random stands
- Use a dedicated device (probably a tablet) for queue management
- Log into the YouTube app on the streaming device and tablet using the same Google account
- Use a different Google account than your primary personal one
- Have a way to tell (and remind) people that they need to select Play next in queue when adding a video. This will add it to the end of the queue.
- Other options can play the video immediately, cutting off the current song and “skipping the line.”
- I use a label stuck to the top of the tablet’s screen
- Before doing a session, you can “sound out” the room by placing your mics about where people will sing (facing away from the main speakers), setting their faders to max volume, setting their gains to about 12 o’clock (usually default), and playing music as loudly as you expect to play it while people are singing. Remember that people are loud, so the music may seem very loud in an empty room. Sing along with the tracks to make sure the mics’ gains are high enough to be heard. If you get feedback from the mics, turn down their gains until that stops, then back them off just a little more. Adjust their faders down to 0dB (not to the bottom/muted). You should now be safe to use your mics’ full fader volume during the session.
- If you get feedback during the session, start by turning down the gains on the mics.
- Tell/remind people to hold the mics close to their mounts (I jokingly tell people to “eat the mic”). Many people are nervous and hold mics too far from their mouths, which forces me to turn up the volume/gain on the channel, which eventually causes feedback.

Leave a comment