Year Originally Released: 2017
Version Played: Tom Clancy’s Ghost Recon Wildlands Standard Edition (via Game Pass)
Platform/Hardware: Xbox Series X (all button notes are for an Xbox controller)
Primary Game Genre: Tactical shooter
Player Perspective: Third-person
Video: Official Launch Gameplay Trailer
Hours Played: 100 (one playthrough)
Achievements: 66% (38/57)
Gamerscore: 56% (835/1,000)
My Favorite Thing: Combat flexibility
My Least Favorite Thing: How grindy it is to unlock advanced skills
Why I Started Playing It
As I’ve previously noted, I feel like I’ve played most of the games I’ll like in my favorite genre (open-world with RPG elements and real-time combat), so I scrolled through the Game Pass library a few months ago and flagged this one as a potential option. I’d just come out of Dragon Age II, so I figured even if the game was a little dated, it would still feel more modern than what I’d been doing.
Before this game, I’d never played anything from the Ghost Recon series, but I had played a fair number of Ubisoft titles from the Assassin’s Creed and Far Cry series.
Story and Characters
You are a fabled “ghost,” a member of an elite US combat team that gets covertly deployed to situations for which traditional military methods and personnel are not reasonable, most commonly for political reasons. For this game, your foe is a Mexican cartel that has partnered with the Bolivian government and security forces to operate an unimaginably lucrative cocaine production and distribution operation. Your missions is to destabilize that operation enough to make its leaders vulnerable to attack or coercion.
Actual character customization is pretty minimal: basically a voice and a choice between some pre-defined body types that can be slightly modified, then a surprisingly limited number of haircut options. However, as anyone who has played an Ubisoft game can guess, there are literally hundreds of cosmetics. Many are available right away, and more can be unlocked via the normal Ubisoft methods: lengthy grinding or simply paying money.
You’re a member of a four-person squad. Your squadmates are pre-defined and pretty standard elite military archetypes. However, the named members of the the cartel have a good amount of variety and some interesting backstories, including a US scientist lured to Bolivia by money/freedom and a developmentally disabled person who does some of the cartel’s dirtiest work without grasping the morality of their actions. Basic details of these characters are revealed by story missions, and additional color can be found by gathering collectibles.
Gameplay
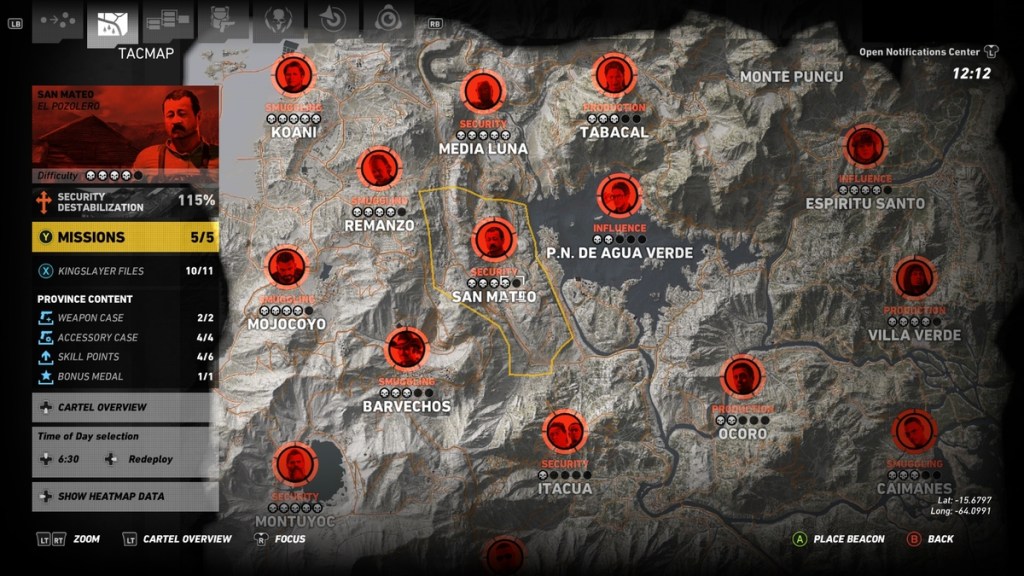
This is an example of the proper use of the Ubisoft Formula: a very large, very pretty map with dozens or hundreds of things to do, many of which can be done in any order. Similar to many open-world games, the map is separated into regions that are controlled by underbosses, and completing story missions in those regions either reduces the influence of the underboss or draws them out, which opens them up for attack or capture. The difficulty of each area and underboss is rated from one to five skulls.
You can drive any vehicle you encounter, and I’d put the mechanics on par with Far Cry and the better GTA games. I never just drove around for fun, but driving never interfered with my ability to the enjoy the game, and the helicopter mechanics were satisfying. However, I think this is the first time I’ve encountered a dirt bike I didn’t enjoy driving, either in real life or in a video game. It’s comically bad.
Combat and Tactics
The best description of combat and tactics during my playthrough (on Arcade/Easy difficulty) is essentially Far Cry in third person. Bases and outposts can be cleared slowly and methodically using a combination of silenced guns and stealth melee, or (with the correct loadout and support upgrades) they can be quickly cleared with loud/powerful guns, called-in mortar strikes, and support fire teams. Enemy support elements like lighting panels and alarms can all similarly be disabled with via covert or loud methods. Most objectives are flexible enough to allow multiple approaches, but some require a stealth approach and will fail if the player is identified by the enemy (just being seen is fine).
There are lots of toys (mines, frag grenades, flashbangs, diversion lures, C4, etc.), and the most important is the drone. It’s a personal one that can be deployed at any time. By default, it has a relatively short range and can only mark enemies, but upgrades can greatly increase its range/speed, make it more efficient at tagging enemies, and add payloads that can be activated remotely. These payloads can distract enemies with noise, temporarily disable electronics with an EMP, kill enemies with an explosion, or revive squadmates. After a payload is used, there’s a cooldown before the drone can be used again.
The most powerful function of the drone is “sync shot” where enemies can be marked for synchronized elimination by squadmates. This is initially limited to one enemy at a time, but with upgrades, it can be up to three enemies with a fairly short cooldown. The neat part is that once enemies are marked, squadmates will hold their fire until 1) you issue the command or 2) you fire your next shot. The result is that enemies can eventually be killed quickly and quietly in groups of four every 26 seconds. Enemy distribution reflects this: in easier regions, they will often only be in groups of two or three. But in more difficult regions, they’ll often be in groups of five or more.
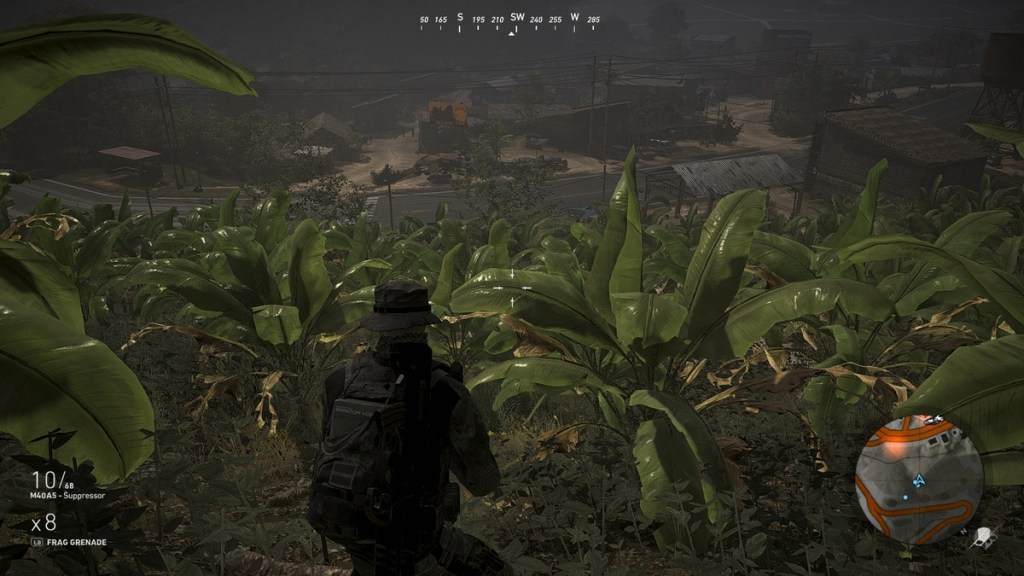
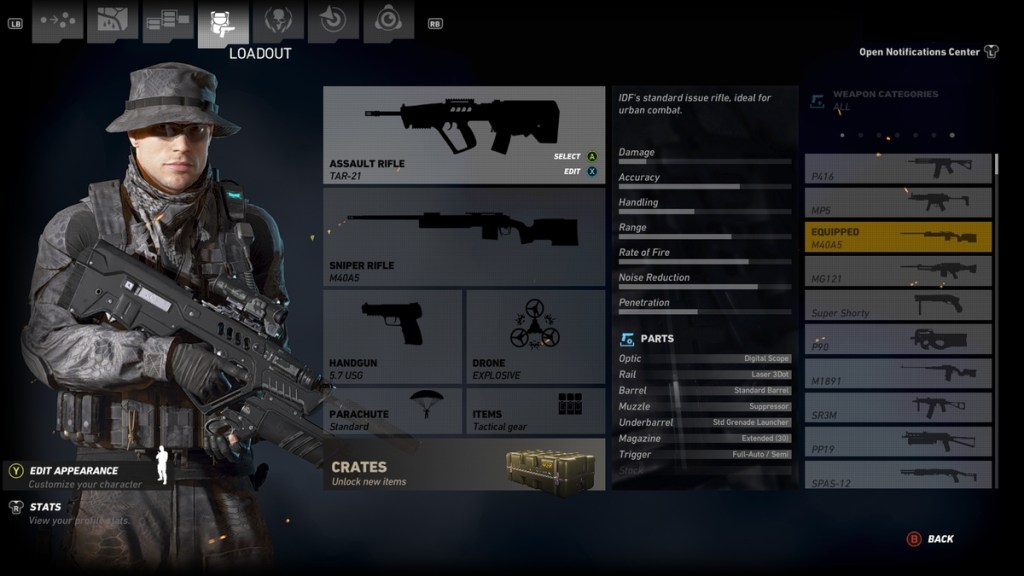
Weapon feel and sound are good: most rifles have a satisfying boom (that you can feel if you have a subwoofer), and sounds of other weapons are varied enough to not seem generic to me. Default weapon swap is between two (Primary/Secondary) and is done with one press of Y. Holding Y swaps to Sidearm. Swap is smooth, and once I got used to the aiming speed and adjusted the sensitivity controls, target acquisition was easy. The interface has the standard headings and mini-map, and enemy positions are indicated by orange or purple areas/dots.
Gear
From a weapons perspective, this game is definitely military porn. There are no made-up manufacturer names or quirky model numbers; I’m pretty sure every gun actually exists, and they are all modeled in what seems like very high fidelity for a game released in 2017. All non-unique guns can be modified with parts that are discovered by opening chests out in the world. Modifications are non-linear, meaning nearly all parts have a tradeoff, such as a long barrel that increases range at the cost of handling. I enjoyed playing around with different combinations of parts and guns to find the combo I liked the most. My favorites are listed at the end of this post.
There are no stat/gameplay benefits for any other gear: worn armor has no effect on damage taken, camo doesn’t affect enemy identification, etc. As a result, I set my outfit to patterned grey at the beginning and kept that the entire game.
Upgrading and Resources
Main Resources
- Gasoline
- Medication
- Comms Tools
- Food Parcels
Small amounts of these can be gathered at many places on the map. They won’t show up on the main map, but will be displayed on the mini map as you get close to them. Larger amounts can be gathered by doing region-specific side quests and tagging convoys that are semi-randomly generated around the map.
Skill Points
These are primarily gained by completing missions, but they can also be awarded by gathering collectibles across the map.
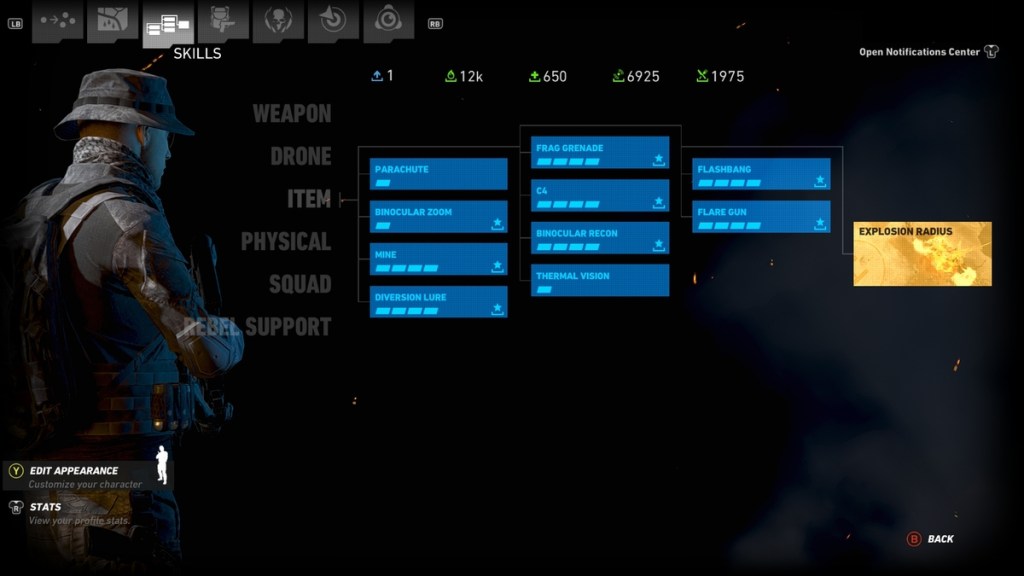
The main upgrade sections (Weapon, Drone, Item, Physical, Squad) have skill trees that are unlocked using a combination of main resources and skill points. There are skill-specific dependencies (a skill can’t be unlocked until another is unlocked) and tree-specific ones (a skill can’t be unlocked until the player is a specific level). Most skills have multiple tiers that must be unlocked separately at increasing costs.
I found that only about half the skills were worth unlocking for my play style, and some of those didn’t need to be fully upgraded to be useful. If you plan on only unlocking the useful skills, you’ll probably just need to grind a little for resources by stealing helicopters/planes and tagging convoys. If you want to fully upgrade all skills for the sake of completeness or an achievement, you’re going to have a grind a bunch. Trust me.
Rebel Support
There are no resources associated with these upgrades. Instead, specific tasks must be completed (specific number in each region) to upgrade the associated support tool. How useful they’ll be depends on your combat style.
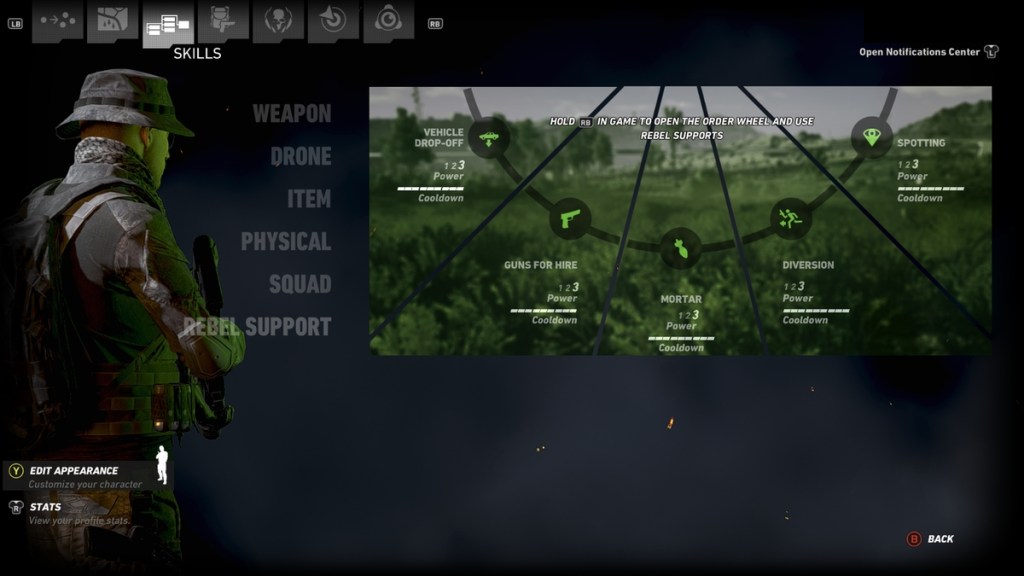
- Vehicle Drop-Off seems to be the most universally beneficial: a vehicle is dropped off near the current location. With upgrades, this goes from a basic SUV to a helicopter.
- Guns for Hire makes a fire team available for (relatively) quick deployment. They follow you until you leave in a vehicle or they die. Good when you know you’re going to have to hold a position against waves of enemies.
- Mortar calls in a strike that hits a small area with multiple hits. Good for quickly eliminating clustered enemies and destroying stationary vehicles or emplacements (like anti-aircraft guns).
- Diversion seems to be similar to Guns for Hire, except they go to a specified area instead of following you? I didn’t use this one much, so I’m not sure.
- Spotting was the most useful rebel support for me since I scoped out areas before clearing or assaulting. Fully upgraded, it can reveal all enemies in a medium-size camp in a few seconds, including ones without a sight line.
Final Thoughts
As a first experience with the franchise, this was a fun playthrough. Gameplay and combat were flexible, there were lots of weapons to choose from and customize, the graphics were great for a game released in 2017, and the story…existed. It comes with the standard Ubisoft games pros and cons, and you probably know whether those pros outweigh the cons for you. If you enjoy third-person shooters (tactical or arcade), this one is probably worth your time, especially since it can frequently be purchased cheaply at this point (and is on Game Pass).
Tips/Things I Wish I’d Known
- In the Gameplay options, turn Toggle Aiming Mode to Current Weapon only. This means each gun “remembers” its aiming mode instead the same mode being used on every gun.
- As soon as you start working on a region, gather all the possible intel as soon as possible. This will show you where a bunch of useful stuff is (resources, rebel support tasks, etc.), which will minimize the chances that you have to clear a base twice because you missed something the first time through.
- Level up the Vehicle Drop-Off rebel support task as soon as possible to gain the ability to call in a helicopter whenever you want (with a cooldown). Unfortunately, the rebels seems to have pretty awful tracking, because helicopters were routinely delivered far away (up to 300m+) or on top of the cliff right behind me.
- Sync shot killing all snipers is a pretty solid way to start clearing a base.
- Gun-mounted grenade launchers are absolute game-changers, especially early on. Using mines strategically helps a lot, but destroying vehicles with bullets of all types takes a lot of ammo and time. Or one shot from a grenade launcher. However, since they can only be mounted to assault rifles, using one does limit loadout options a bit.
- When they say you need to fly low to avoid anti-aircraft missiles, they mean low. Like, basically touching the ground or below the sight line of the battery. Thankfully, the missiles are on the slow side, so it’s possible to fly over a ridge or around an obstacle to avoid them.
- Most gun attributes are pretty self-explanatory, but I was probably over 80% into my playthrough before I looked up Handling. Turns out it’s essentially recoil (higher means less), not anything related to weapon swap speed or effect on running speed.
- Bullets are slow compared to real life. You will have to compensate when shooting at targets at <100m with 5.56mm rounds, and I found some of the shorter-range sniper rifles essentially useless outside of 150m on stationary targets, much less moving ones.
- When you pick a fight with Santa Blanca, you can kill everyone (eventually). Even if they trigger an alarm, once you kill the reinforcements and any passersby, you’re done. However, when you pick a fight with Unidad, the reinforcements are unlimited, and they escalate in difficulty. Think the police/military mechanic in Grand Theft Auto. Most of the time, it’s best to retreat/hide enough to lose your “wanted level.”
- The allegiance between Santa Blanca and Unidad is…fragile. If they’re both guarding something and shooting starts, there’s a decent chance they’ll start shooting each other. I’ve seen YouTube videos of people taking covert/silenced shots at the ground between troops and initiating a fight.
- The combo of an upgraded drone EMP and sync shots (enabled by drone Spotting) makes convoy tagging much easier.
- If you’re struggling with stealth, do the Silent Spade side mission as soon as possible. But be warned: the last part is rough.
My Endgame Loadout
- Primary Weapon: TAR-21 assault rifle
- Digital Scope
- Full Auto trigger
- Extended (30) magazine
- Standard Grenade Launcher underbarrel
- Laser 3Dot rail
- Standard barrel
- Suppressor muzzle
- Secondary Weapon: M40A5 sniper rifle
- G28 scope
- Semi-Auto trigger
- Standard (10) magazine
- Standard barrel
- Suppressor muzzle
- Sidearm: 5.7 USG
- Standard (20) magazine
- ATPIAL Laser Sight rail
- Standard barrel
- Suppressor muzzle

Leave a comment